Apple’s devices typically perform well and users generally have smooth experiences. What about sharing files between an iPhone and a Mac? Somehow, I keep hearing that’s tricky but, really, it’s quite easy.
There are times you may need to transfer a file from your Mac to your iPhone or vice versa and you want to do it fast. Here are a few methods.
How to Transfer Files Between iPhone and Mac
Transfer Files Between iPhone and Mac via AirDrop
Of course, the easiest way to transfer files between iPhone and Mac is through AirDrop. The feature allows the effortless transfer of files from iPhone to Mac and vice versa.
You just need to turn on AirDrop on both devices and turn on Bluetooth and Wi-Fi. You can transfer various types of files, from photos to videos, emails, websites, and even locations.
From your iPhone:
- Turn on AirDrop
- Turn on Bluetooth and Wi-Fi.
- Select AirDrop. Set “Everyone/Contacts Only“.
From Mac
- Go to “Finder” and select AirDrop.
- Turn on Wi-Fi and Bluetooth.
- Allow AirDrop.
- Select “Allow to be discovered by” to “Contacts Only/Everyone“.
- Tap on “Share” and select AirDrop.
But what if you need more?
Transfer Files Between iPhone and Mac via Cloud
Another smooth way to transfer your files from iPhone to Mac is to store your files, photos, and videos in the cloud where they automatically stay up to date on your iPhone and Mac or Windows PC. With iCloud, you can store your files so you can access them on all your devices, but keep in mind that iCloud offers you an email account and 5 GB of free storage for your data.
Here’s how to Set up iCloud on your iPhone:
- Go to Settings, to your name.
- If you’re not signed in, tap “Sign in to your iPhone then enter your Apple ID and password.
- Tap iCloud, then turn on items to keep their data in the cloud.

This way, you’ll be able to access your data in iCloud from anywhere.
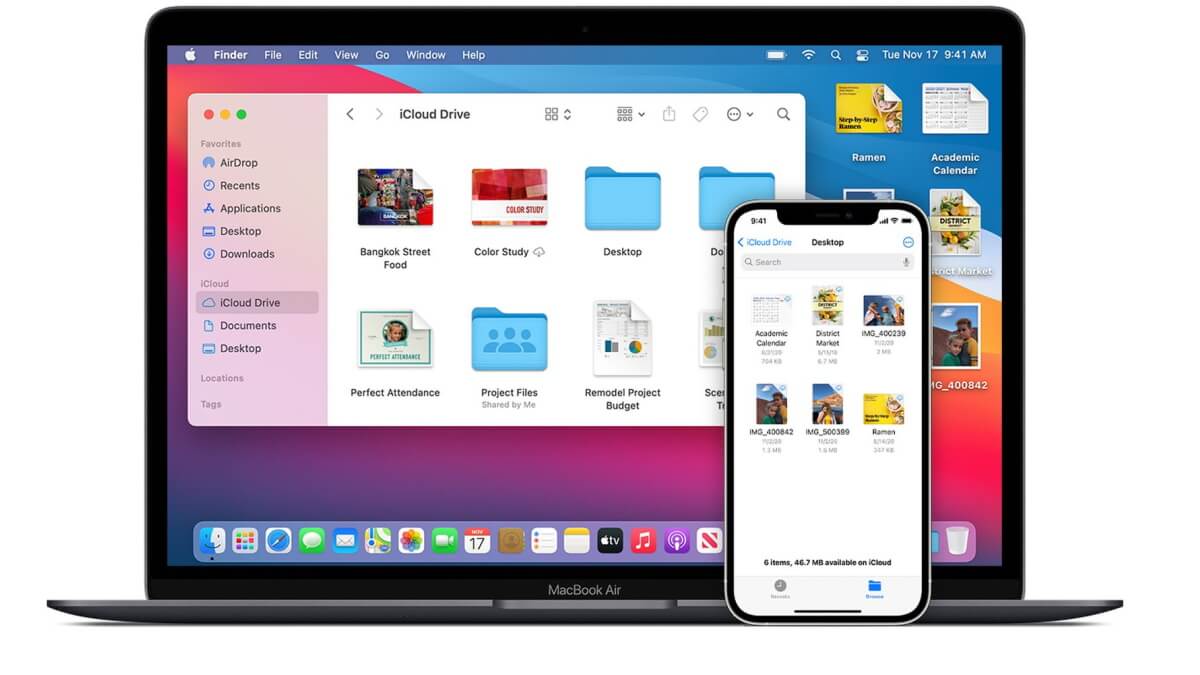
Transfer Files Between iPhone and Mac via iCloud Drive
To move files using iCloud Drive, you first have to set up iCloud Drive on your iPhone or Mac. Here’s how to do it:
- Choose the file you want to share and tap the Share icon
- Scroll down and tap on Save to Files.
- Select iCloud Drive under Locations from the menu.
- Select Save then open Finder and click on iCloud Drive, where you’ll find your files.
Transfer Files Between iPhone and Mac via Email
This is the simplest way to transfer files between devices.
You simply compose a new email and attach the files you need, then open it on your Mac via iCloud email. However, keep in mind this works well for small files that fit into the attachment limit.
Transfer Files Between iPhone and Mac via Finder
After you connect your iPhone to your Mac or Windows PC with a cable, you can sync numerous types of data and transfer whatever types of files you need.
- Link your iPhone to the Mac using a USB cable.
- Open Finder on your Mac and click on your iPhone’s name under Locations.
- Select the Files tab at the top to see a list of apps that have files.
- Click the right arrow next to the app to show its files.
- To transfer your files on the iPhone, drag and drop the files from your computer and into the app in Finder.
As you can see, there shouldn’t be any obstacles in transferring files from your iPhone to your Mac smoothly. Wasn’t that easy?
Let us know which method you found easiest and don’t forget to share your tips on how to transfer files between iPhone and mac if you have any!
Transfer Files Between iPhone and Mac using EaseUS MobiMover
A nicer way to transfer files from your iPhone? We tried the free EaseUS MobiMover software and found it’s much better if you have a lot of files and photos – because you have a lot more options. It’s a bit overkill if you just want to send a photo from your iPhone to your Mac or viceversa but great if you have a lot of data to sort through.
MobiMover works with any Mac, PC or laptop but it’s especially great if you’re sometimes dealing with Windows. When transfering photos from iPhone to a Windows laptop, the Windows Explorer bit can slow to a crawl when loading previews.
If you just want to copy a few select photos in your iPhone camera roll, the Windows Explorer part makes things tedious. Data transfer software like MobiMover is more convenient – especially since it has a backup manager as well, which works even with apps like WhatsApp.
Also, since Apple decided with iOS 11 to give us HEIC as a file extension for photos, hundreds of thousands of people have had to ask how to convert HEIC to JPG or PDF – our team included.
Nicely enough, you can use MobiMover as a one-stop shop for transferring files from your iPhone to your computer AND it has a HEIC to JPG file converter embedded in it – just drag and drop your files there. It’s super great if you have more people with iPhones who have to share a workstation (common for content creators), since everyone can do file transfers and backups fast.
Makes our old tutorial kinda obsolete, doesn’t it?
Follow TechTheLead on Google News to get the news first.